Installation
Installing via Boilerplate (Fresh Laravel Projects)
If you are starting a fresh new project with laravel then it can be the best option for you. You can skip all these steps and directly clone available boilerplate with all packages installed.
There are various boilerplates available as per your choice of templates like Bootstrap & AdminLTE. It also has a boilerplate for some paid popular templates like Metronic theme & FlatLab theme (If you have purchase those themes). You can find them here:
Bootstrap Templates
AdminLTE Templates
Metronic Templates
FlatLab Templates
You can find complete steps here
Installing into existing Laravel Projects
If you have any existing project then you can continue with following steps.
Add Packages
Add following packages into your composer.json.
"require": {
    "infyomlabs/laravel-generator": "dev-master",
    "laravelcollective/html": "5.2.*",
    "infyomlabs/core-templates": "dev-master"
}
use "laravelcollective/html": "5.1.*" if you are using laravel 5.1
Generator also supports various other templates like AdminLTE, Metronic, FlatLab. Check Templates section for more details.
If you want to generate a swagger annotations for your api documentation, you need to install following packages with it,
"require": {
    "infyomlabs/swagger-generator": "dev-master",
    "jlapp/swaggervel": "dev-master"
}
If you want to use Generate from Table option, you need to install,
"require": {
    "doctrine/dbal": "~2.3"
}
Composer Update
After adding packages, run the following command:
composer update
Add Service Providers
Add following service providers into your providers array in config/app.php
Collective\Html\HtmlServiceProvider::class,
Laracasts\Flash\FlashServiceProvider::class,
Prettus\Repository\Providers\RepositoryServiceProvider::class,
\InfyOm\Generator\InfyOmGeneratorServiceProvider::class,
\InfyOm\CoreTemplates\CoreTemplatesServiceProvider::class,
Add Aliases
Add following alias to aliases array in config/app.php
'Form'      => Collective\Html\FormFacade::class,
'Html'      => Collective\Html\HtmlFacade::class,
'Flash'     => Laracasts\Flash\Flash::class,
Publish Vendor
Run the following command:
php artisan vendor:publish
Customize Configuration (optional)
If you have tweaked any paths or laravel settings like custom namespace, rather than regular laravel installation, check out this page and configure the generator based on your settings
Publish
Publish generator stuff:
php artisan infyom:publish
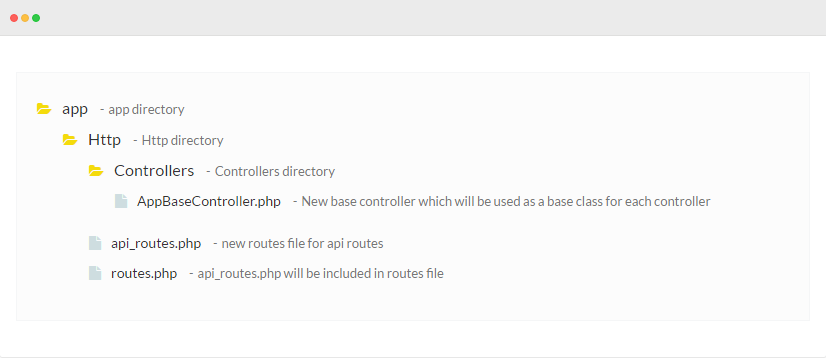
By publishing api stuff, it will create following files:
If you have a fresh new laravel application and want a basic bootstrap admin panel layout, then you can use Publish Layout Command.
Now we are all set to get started with the generator.